
A few thoughts on wooden cladding
Below is some food for thought when it comes to installing wooden cladding to a garden room or other structure.
Horizontal or vertical and which profile to use?
Possible cladding profile options
Diagram from TDCA
With a wide choice of profiles it’s up to you really as to what pattern you prefer and in terms of horizontal or vertical well essentially it’s an aesthetic choice, but what it will do is affect the design of the batons that are fixed to the building.
Fixing the cladding to the structure
Fixing batons to your structure in the correct orientation is important because it creates a ventilation space behind the boards. This allows moisture to escape and also equalises the moisture content of the boards and reduces cupping or distortion. Basically the batons run the opposite way to the cladding, vertical cladding fixes to horizontal batons and visa versa.
The standard baton spacing measurement for the more common horizontal cladding pattern is 38X38 mm batons at 600mm centres as a minimum.
For vertical cladding a ‘counter baton’ configuration is required, this is because there wouldn’t be sufficient ventilation if just a cross baton was used. Again38x38 mm batons are used. Attach your vertical batons first, then the horizontal ones.
Don’t forget the insect mesh! Attach it to the base of the batons so it stops those creepy crawlies setting up home in your home.
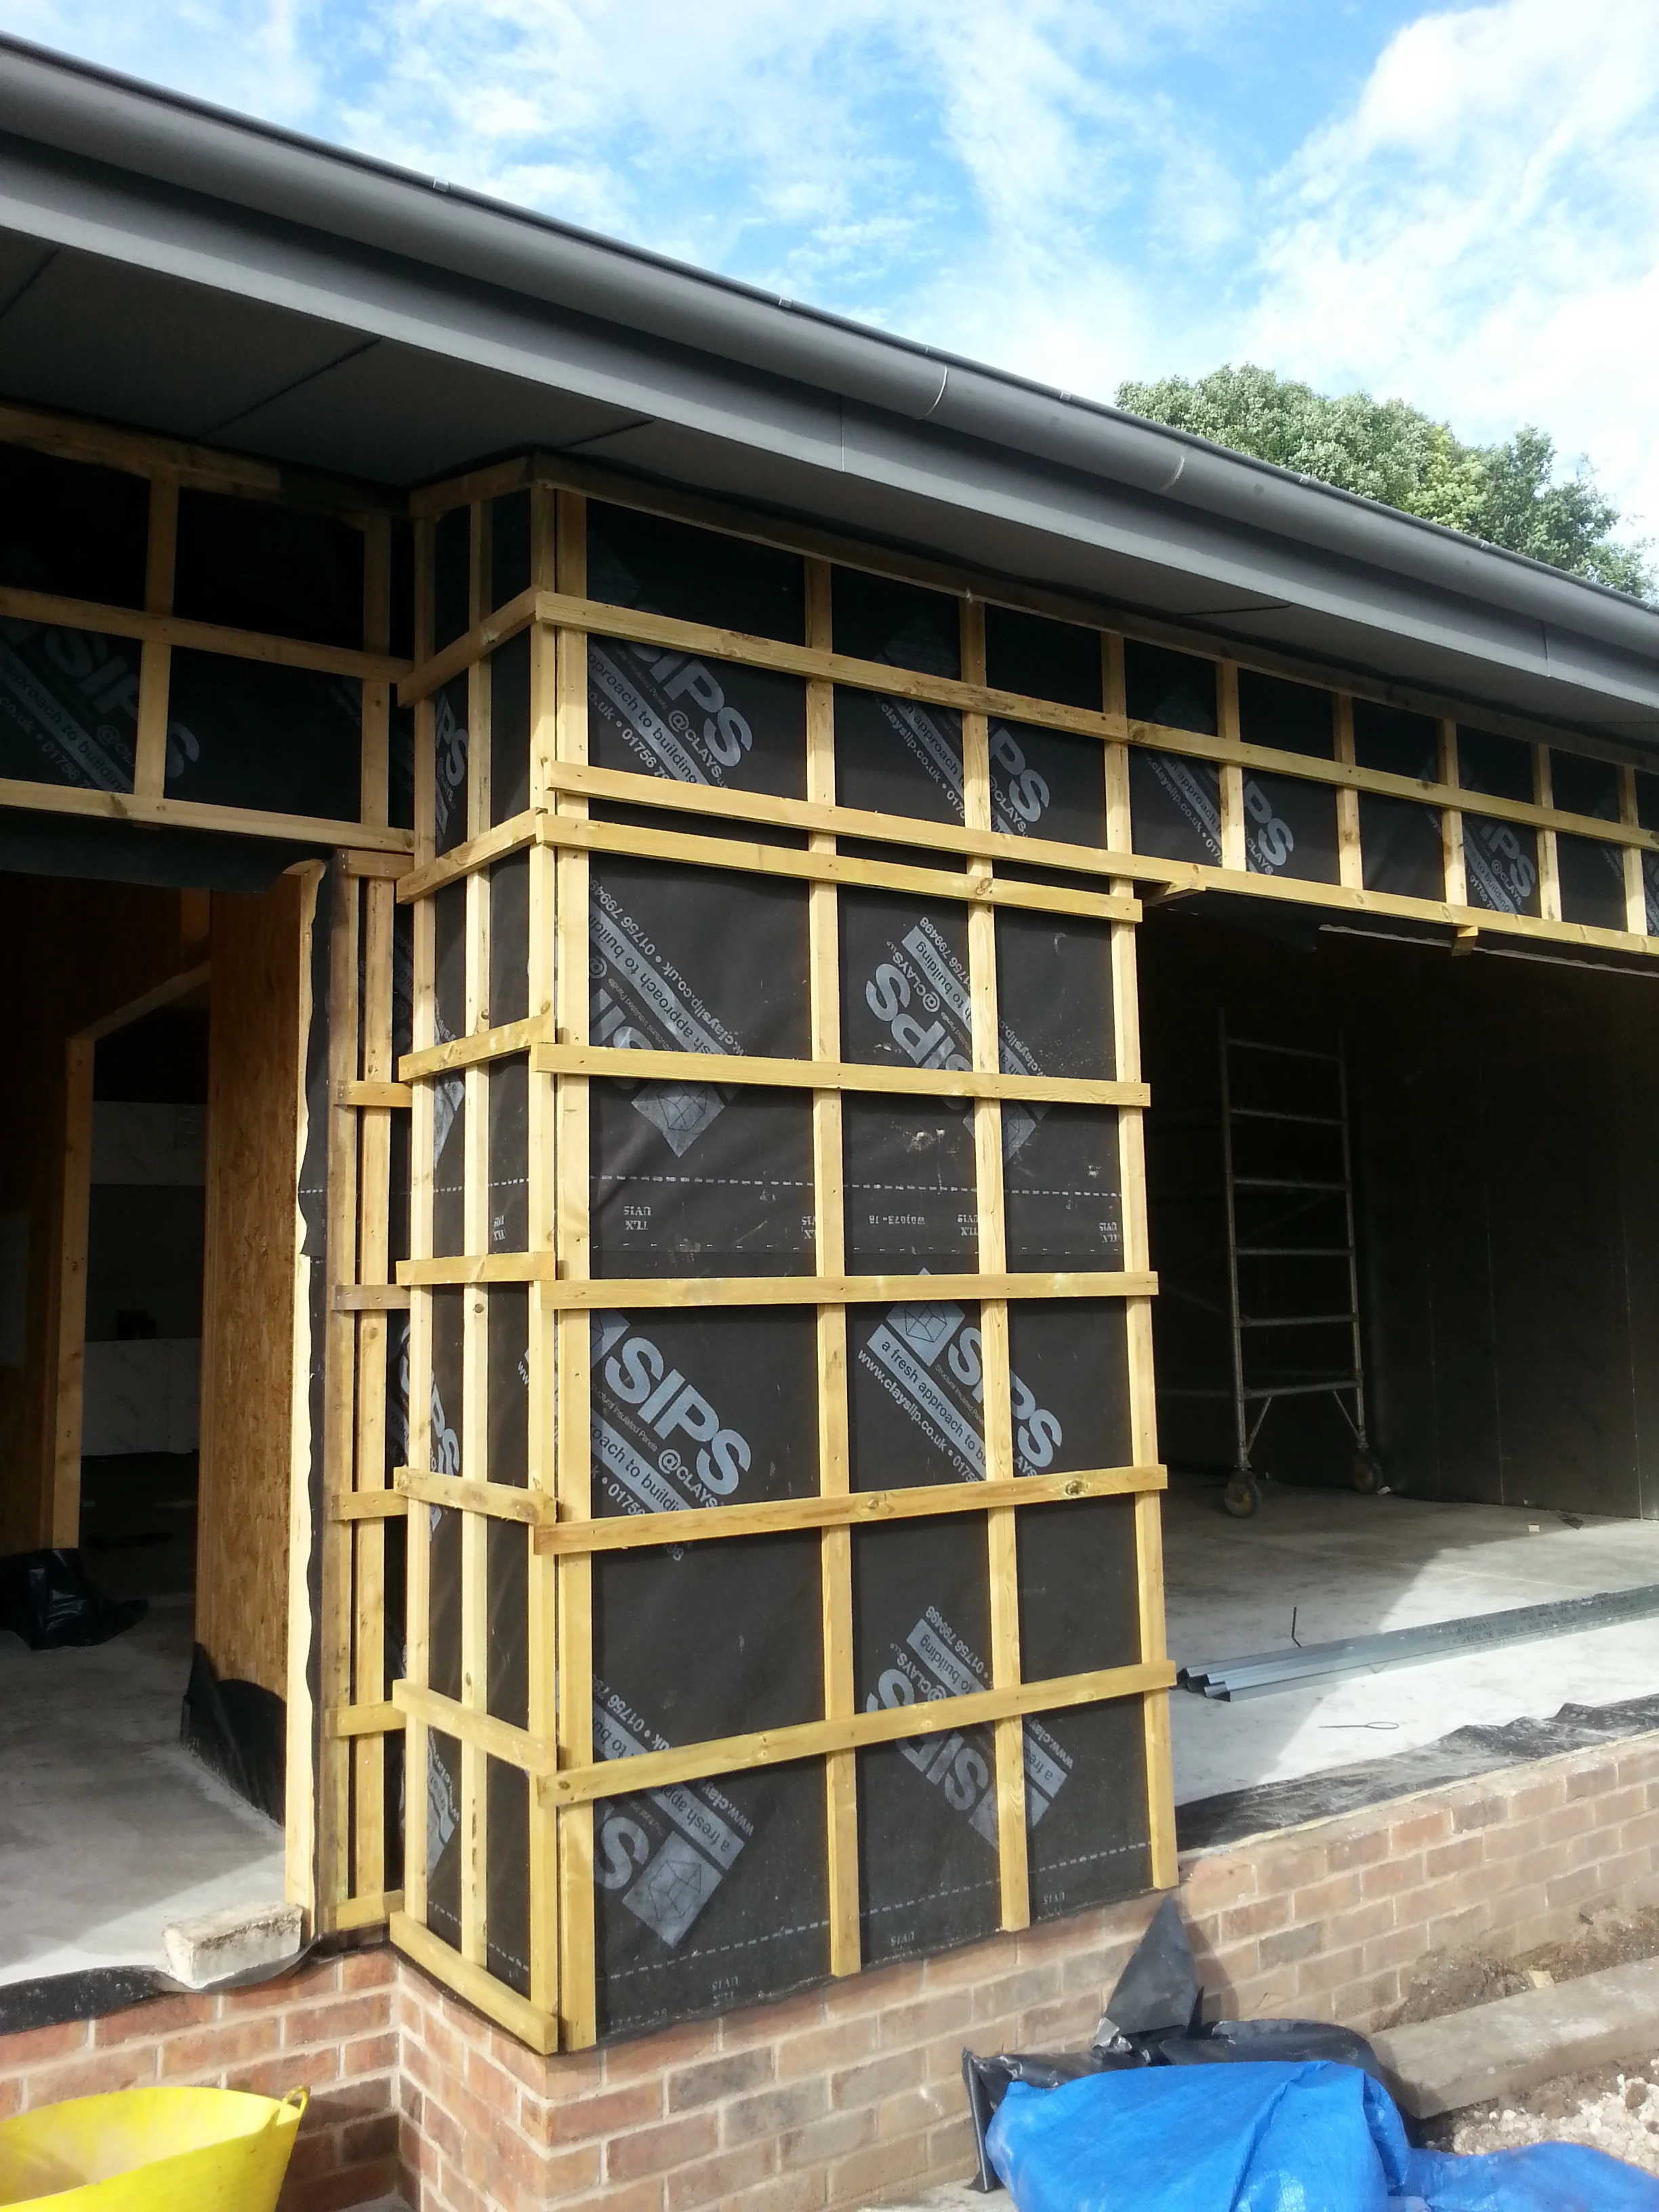
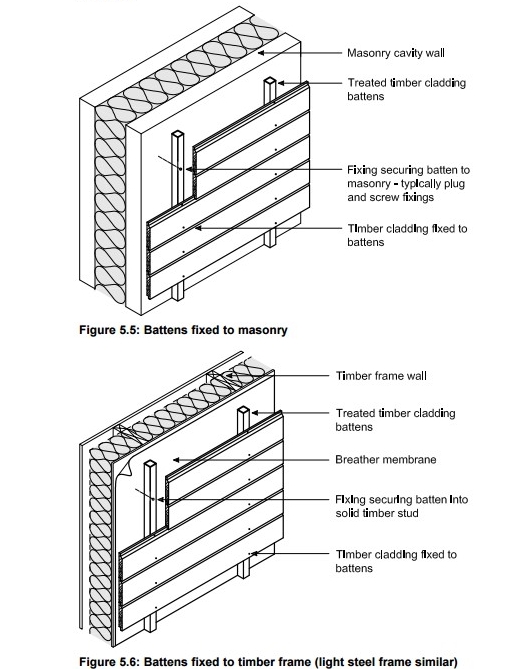
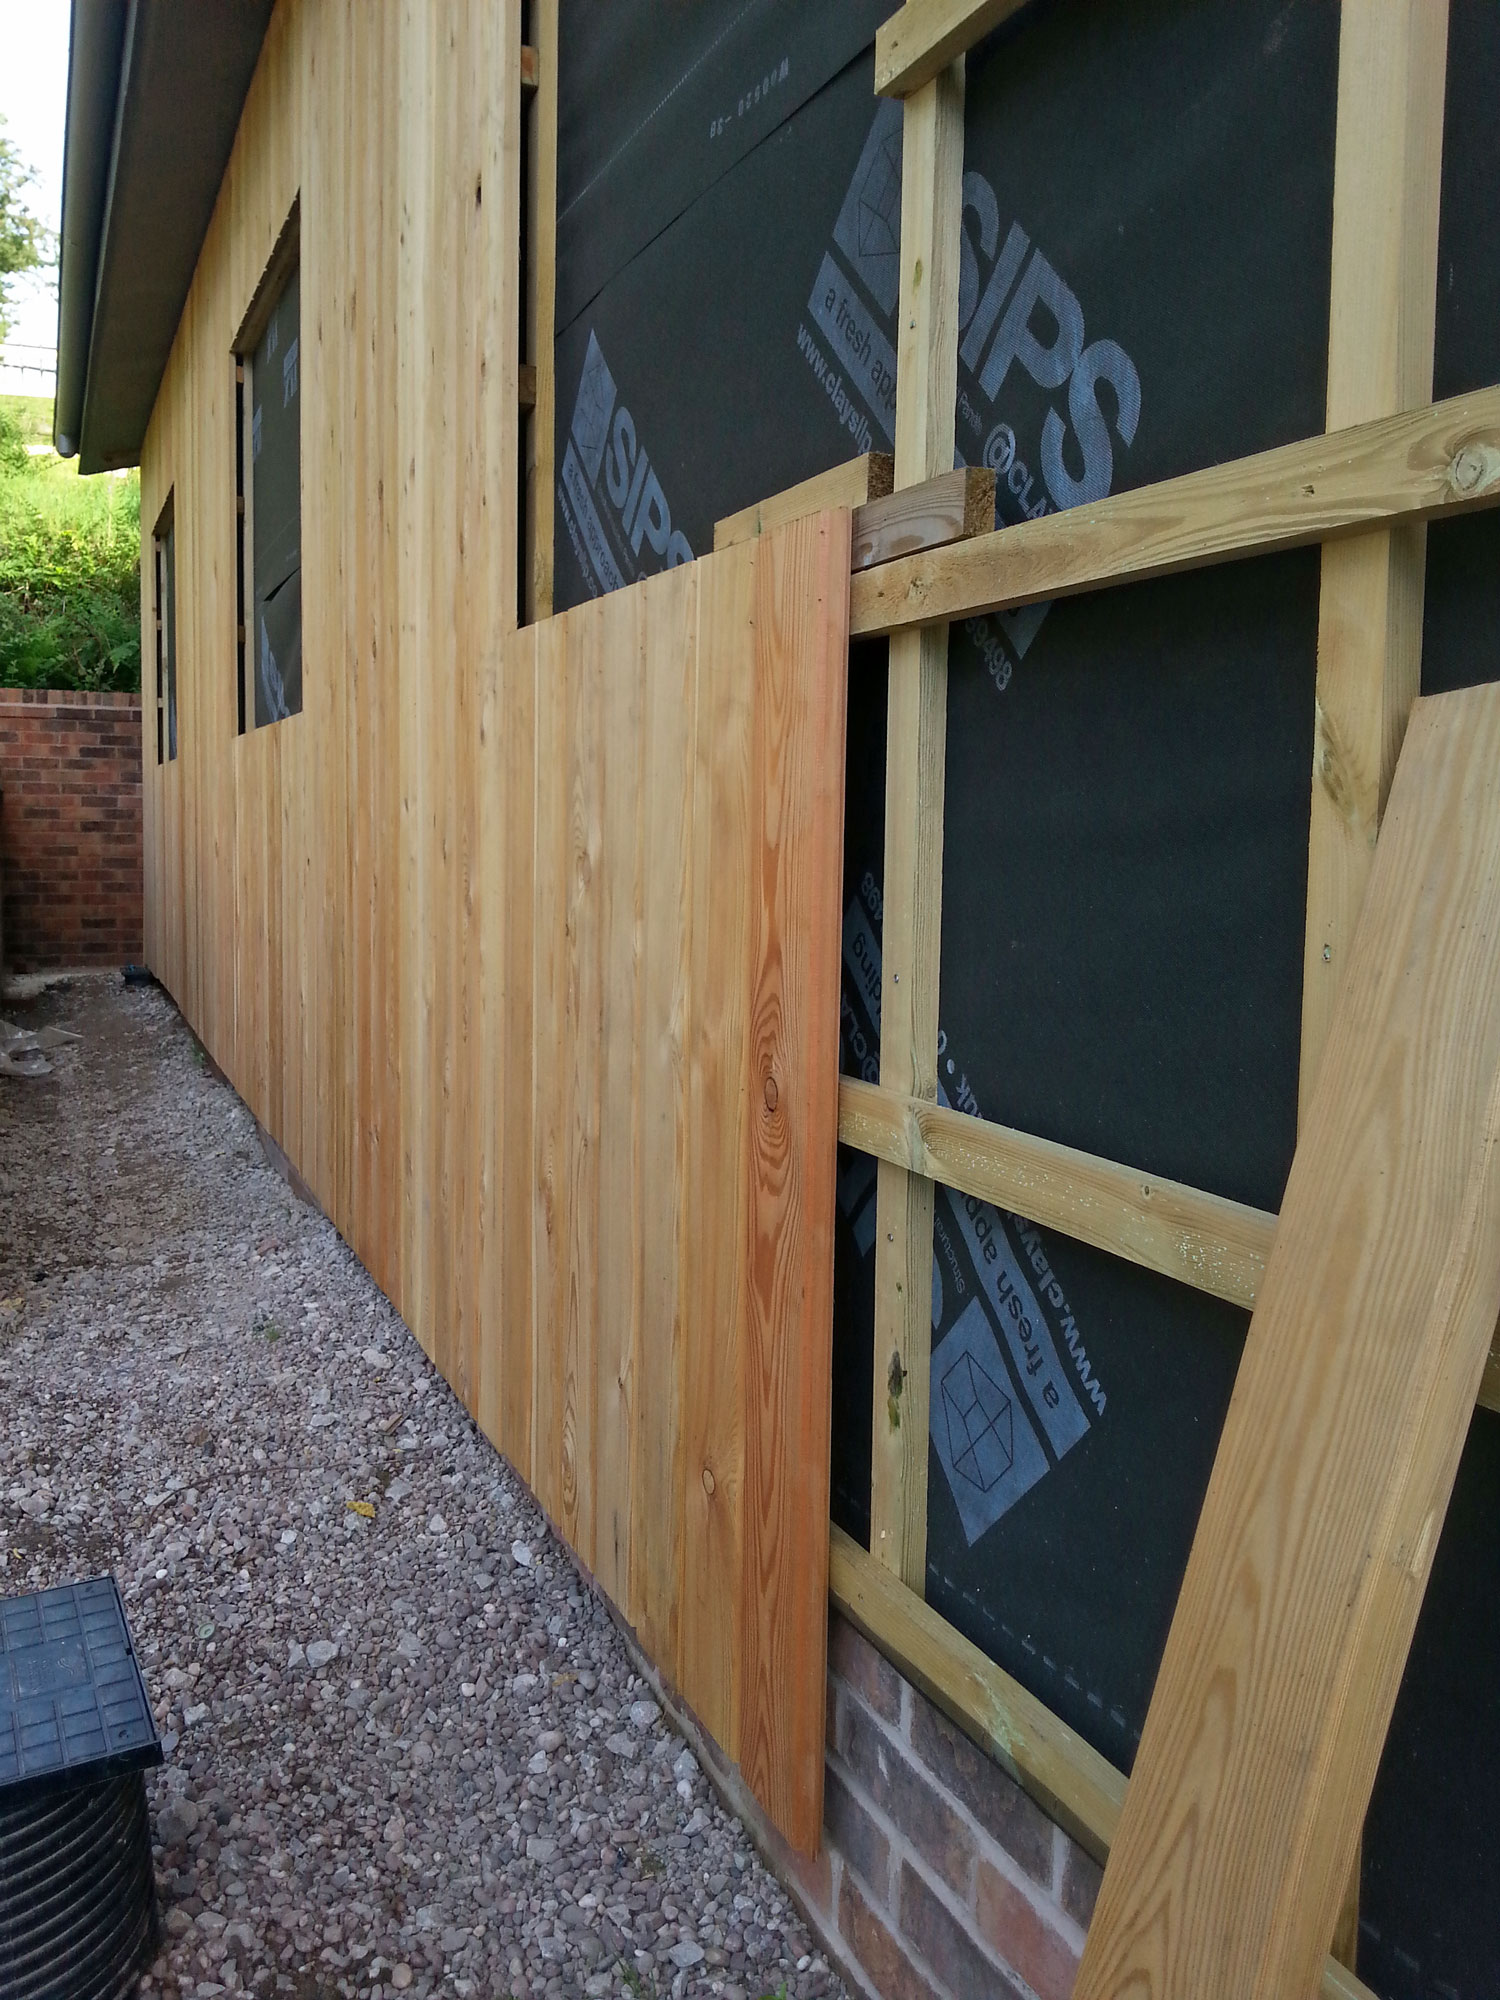
Diagram by TRADA
Fixings
Stainless ring shanks are preferable, I wouldn’t use brads but if you don’t want to see the nail head then stainless brads have been used but these can pull out as the boards expand which is obviously not desirable! It’s a risk you may or may not want to take.


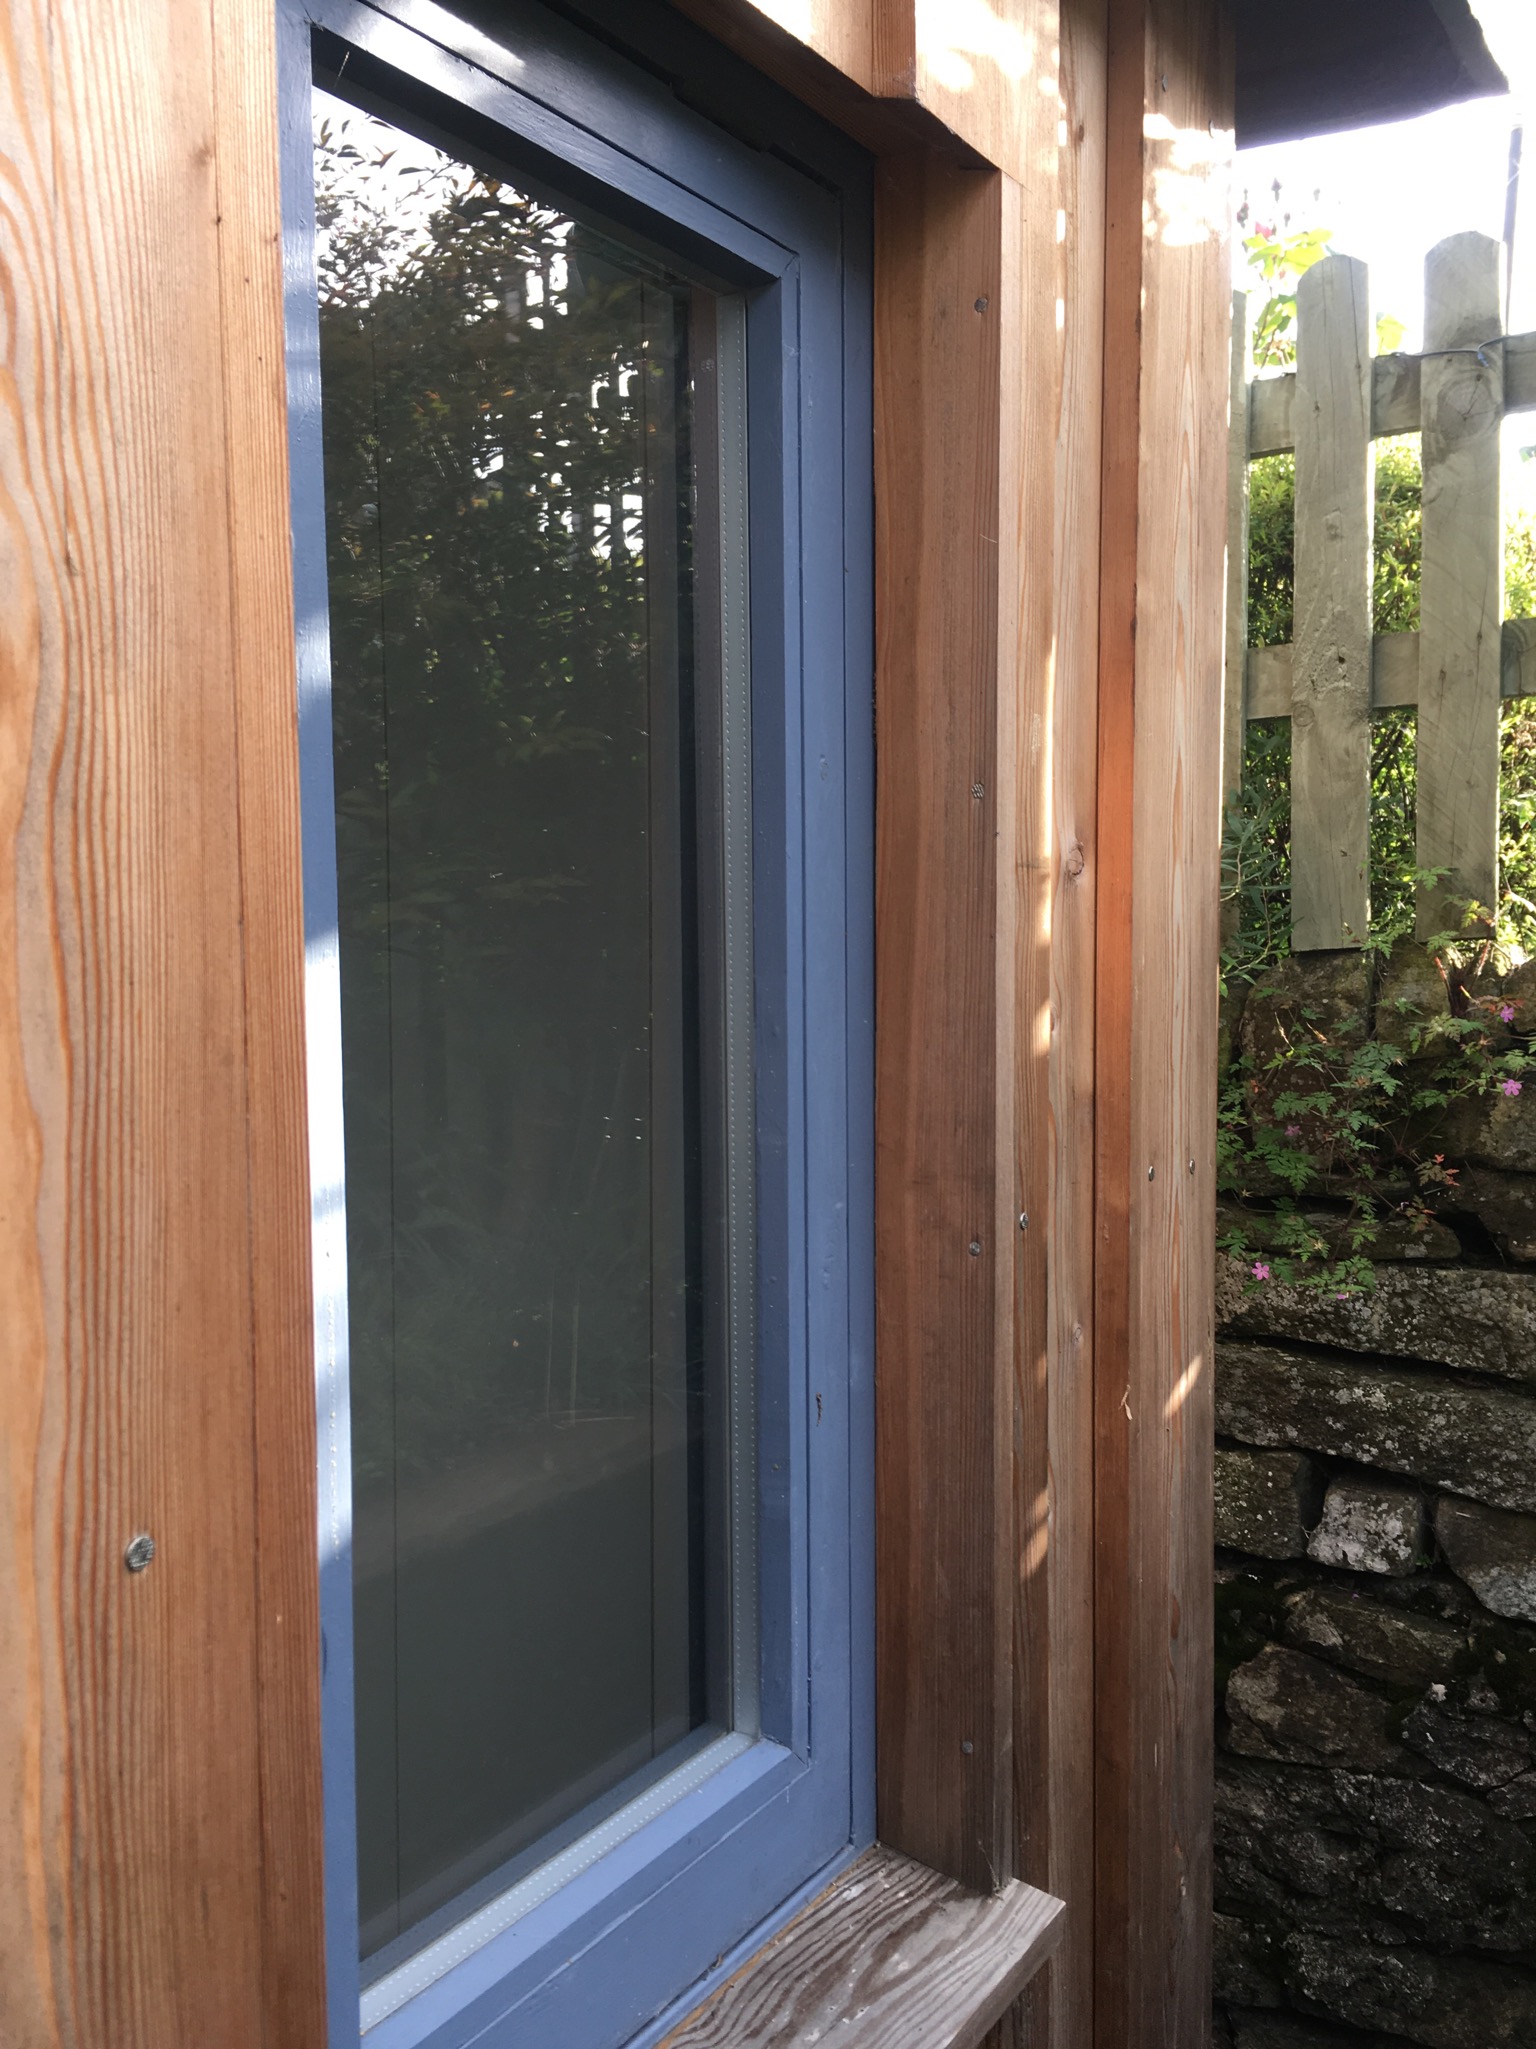
Details around windows and doors
As with anything the devil is in the detail. Its good practice to extend the boards past the window head to prevent water driving back in. The boards should also be cut back at an angle to create a drip feature. The closing piece may require a vent in some cases, in this board on board system there is adequate ventilation without.
The sides of the windows can be closed with an offcut, which is trimmed and planed to size, which gives a very neat finish.


In this image the cladding edge has been cut back correctly to create the drip feature but there is insufficient overhang so when the window is installed there will be no way to close the head correctly and water ingress could be the result. In our opinion it’s always best to install the windows first.
Image shows the lack of an overhang to take the water away.
Corner details
In a horizontal system you wouldn’t want to see end grain on corners so this can be overcome by using a corner detail as in the image left. This is to hide unsightly end grain and to reduce the moisture take up of the boards. In a vertical arrangement the boards can be simply butted up to each other and fixed, they just have to be set out correctly. This means laying the boards from center outwards to ensure even cuts at each end, much the same way as tiling a room.
Diagram by Vastern Timber
Movement
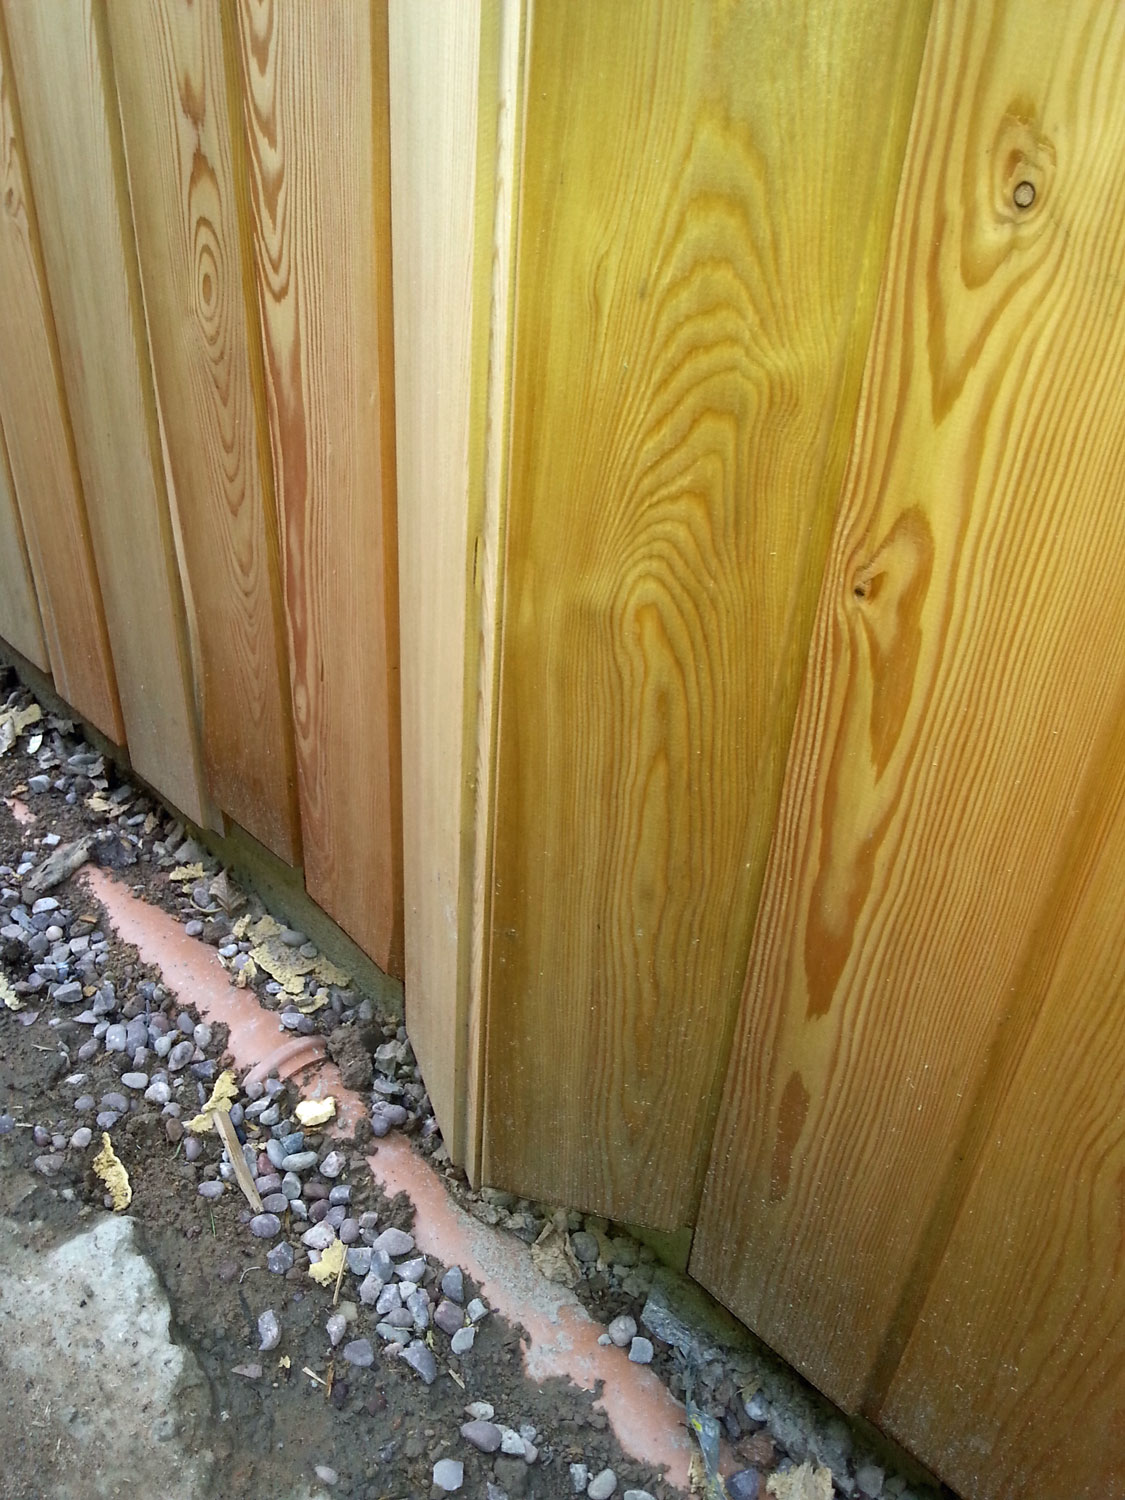
All wood expands and shrinks and any cladding needs to be installed with this in mind. To prevent this buckling from happening don’t aggressively cramp up boards together and if you are doing a large run (especially with T & G type profiles) allow some small expansion spacing in the center few boards. It only has to be a millimeter or so but it will stop any cladding from bursting off like shown in the photographs below.
Remember us talking about fixing with brads? This image shows how easily the boards pulled through the brads and resulted in this ‘bursting’ of the cladding. However, as the boards still need to be cut back at an angle to a minimum (absolute minimum) of 150 mm above ground then this will probably be easy to remedy after the timber has dried out.
Another detail to consider for surrounding hard surfaces should be ideally to be sloping away from the building so water drains away or in some cases a splash strip installed.

So in a nutshell cladding needs…
• To breathe.
• To be fixed with the correct nails.
• To expand and contract.
• To have the correct detail around windows and doors.
• To be fitted with care.
Spacetwo's garden rooms can be designed with a range of cladding options. Contact us for further information.